Screenshot of Canva AI Headshot Remover

Canva AI Headshot Remover

Curious about Canva's AI Headshot Remover? We'll walk you through exactly what it is and how to use it effectively in 2025. Plus, we'll touch on its features and how it stacks up against other headshot generators.

Screenshot

What Exactly is Canva AI Headshot Remover?

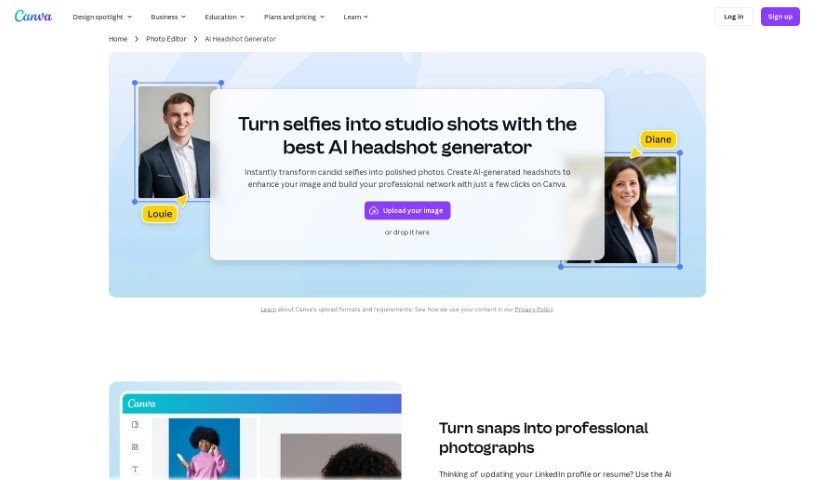
Canva AI Headshot Remover is a super handy feature built right into Canva’s AI Headshot Generator. Its main job is to help you easily get rid of any unwanted bits in your headshots. This tool uses smart AI to make editing your photos feel precise and, honestly, pretty simple. By using this remover, you can quickly clean up your headshots, getting rid of distractions or anything you don’t want in the frame. The result? Images that look really professional. Whether you need to touch up a minor blemish, tweak the lighting, or just tidy up the background, this feature really smooths out the editing process. It lets you achieve those polished headshot looks efficiently, all within Canva itself.

Who’s Behind Canva AI Headshot Remover?

Cliff Obrecht, one of Canva’s co-founders, is the person who created the Canva AI Headshot Remover. Canva itself got its start back in 2012, thanks to Melanie Perkins, Cliff Obrecht, and Cameron Adams. Since then, Canva has really taken off, becoming a go-to online design platform that offers a whole host of design tools and solutions for people all over the world.

Who Should Be Using Canva AI Headshot Remover?

This tool is a great fit for a lot of different people, including:

  • Photographers looking for quick touch-ups
  • Graphic designers needing clean source images
  • Marketing professionals preparing visuals
  • Real Estate Agents showcasing properties
  • Models refining their portfolios
  • Social media managers creating content
  • Recruiters sourcing candidates
  • Business professionals updating profiles
  • Content creators needing polished images
  • Website designers ensuring a professional look

How Do I Actually Use Canva AI Headshot Remover?

Using the Canva AI Headshot Remover is pretty straightforward. Just follow these simple steps:

  1. Find the Tool: First off, head over to the Canva website and look for the AI Headshot Remover tool. It’s usually easy to spot.
  2. Upload Your Photo: Once you’ve found the tool, click on it and upload the headshot you want to work with. This is the picture you’ll be editing.
  3. Let the AI Work: The AI technology is pretty smart. It’ll automatically figure out the headshot in your picture. Then, you can just go ahead and use the remover function.
  4. Check and Tweak: After the AI has done its thing, take a good look at the image. Make sure the headshot has been removed just the way you wanted. Sometimes, you’ll even have options to adjust the settings or fine-tune the results a bit more.
  5. Save Your Work: Happy with how it looks? Great! You can then download the edited image, now with the headshot gone, or save it straight into your Canva account for later.
  6. More Editing? Go Ahead: If you feel like it needs a bit more, you can always use Canva’s other editing tools to enhance or change it further.
  7. All Done!: Once you’ve made all the edits you need, finalize the image. Now you’re ready to use it for whatever you planned!

Honestly, using the Canva AI Headshot Remover is a really simple and effective way to edit your headshot images smoothly, no matter what you need them for.

Related AI Tools

Discover more tools in similar categories that might interest you

123RF AI Image Generator

Creative Image Generation
Learn More

Stay Updated with AI Tools

Get weekly updates on the latest AI tools, trends, and insights delivered to your inbox

Join 25,000+ AI enthusiasts. No spam, unsubscribe anytime.